
Hunting does not mean only tracking down the animal and killing it. The part that most people aren’t aware of is the process of preparing the animal after it’s been killed. For that purpose, every hunter needs a good hunting knife, and by “good” we mean “sharp”. The sharper your knife is the more efficient you will be in your skinning, gutting, deboning, etc. Also, you will need to apply less pressure with a sharper knife, leading to less damage to the surrounding tissues.
To be able to sharpen your knife you will need tons of practice and in the beginning, most of your attempts will seem in vain. What you need to do if you are just starting to learn how to sharpen your hunting knife, is to equip yourself with a lot of patience. Our best advice is to buy a couple of cheap knives from the local store and get better using them. That way, your original main hunting knife won’t get damaged in the learning process. You should start working on it when you are absolutely sure you’ve mastered the proper technique.
Sharpening Methods
Speaking of techniques, there are plenty in the world of hunting knives sharpening. Here are some of them:
- Using Whetstones
- Sharpening Rods
- Pull-Through Sharpeners
- Electric sharpeners
- Guided Sharpening Steel
Now, as you might have noticed, those aren’t really techniques but the actual tool you will be using to sharpen your knives, but in this case, the method’s name coincides with the tool used in the process.
The absolutely most important thing during knife sharpening is the actual angle of the blade to the stone and your consistency with it. Not keeping this angle will result in your blade not being sharp enough and the bevel being round (it must be flat). The most common sharpening method/tool are the sharpening rods. They require less experience and are extremely comfortable to carry around, which is important during a hunt (when you carry countless other items). That, of course, makes the hunter’s top choice.
Before we move on, one more thing worth being taken into consideration is that different blades (with different Rockwell Hardness) will need various grits, whetstones, and materials to sharpen them. For example, the Ka-Bar Becker BK2 sharpens kind of fast but sustains a lot of damage during the process. In this case, you will need to start with a coarse grit and slightly progress towards a finer grit.
Getting To Know The Types Whetstones
Let’s also take a quick look at whetstones and their variations. These sharpening tools are made of naturally occurring stones. Such are the Japanese Water Stones and the Arkansas Oil Stones. There are also man-made stones like the Crystolon and India Stones. These last ones are far cheaper but also inferior quality-wise.
The main classification, though, is whether the tone is a water stone or an oil stone. This indicates what is to be used as lubrication in the process of sharpening. There are manmade hones (diamond and ceramic) which do not necessarily require water for lubrication.
We spoke about grits and this is where they come into play. Every sharpening whetstone comes with a different type of grit. Some are more coarse, therefore more abrasive, and some are finer with the grit being far less abrasive. To achieve the desired edge of your blade, you will need a specific angle and grit unique to your type of blade only. As stated, this is predominantly based on the type of material used in your blade.
Now, it’s time to get into some of the methods used to sharpen your knife.
“The Sharpie” Method
Some might argue that this method isn’t “professional” enough, but it is my favorite nonetheless. Let’s go through the five easy steps now:
- Take a sharpie and color the entire cutting edge black. The main goal here is to shave off the black ink. After removing this ink, we guarantee you that the blade will be sharp.
- Take one or two strokes and check the bevel edge. If there is ink towards the top, lower your angle to the stone and if you see the ink towards the bottom, decrease this same angle.
- After you are done sharpening one of the sides, turn the blade around and start doing the exact same thing with the other side of the edge.
- After all, this is done, flip the blade to the side with which you started and check for any small, raised burrs across it. Gently “wipe” away those burrs by dragging this side across the whetstone.
- You got a freshly sharpened hunting knife!
Pro tip: after you’re done with all this, get some paint remover to wash away any remaining ink on your knife. After all, this is your favorite tool and you have to keep it clean. Not to mention that you do not want ink on the skins or meat you take of your hunted animals.
One more pro tip, as mentioned in the beginning of this guide, is to get a few cheap knives and practice on them for a while. Once you are confident in your knife sharpening skills, get on with your main knife!
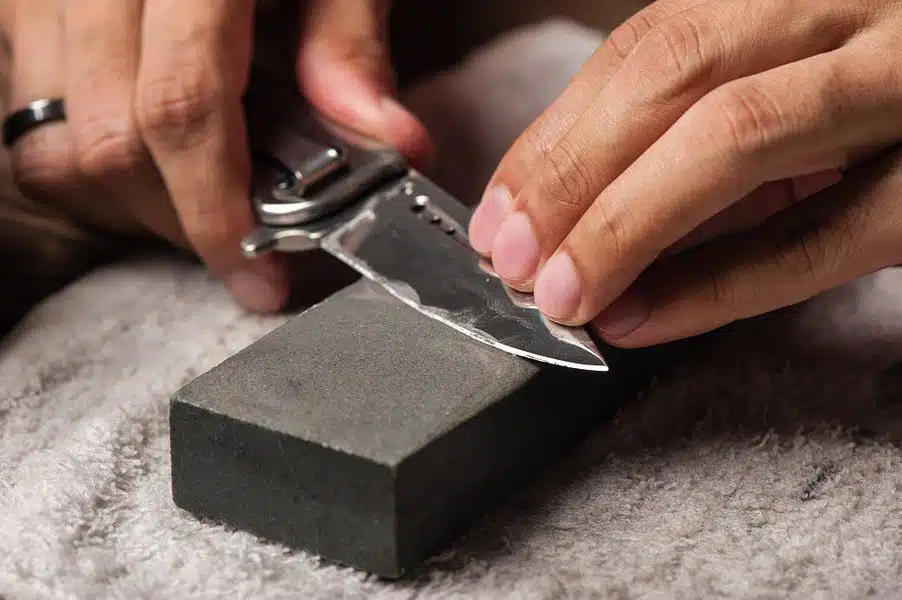
The Basics Of A Whetstone And A Sharpening Rod
Whetstones are used after being submerged in water or oil. They also come with various levels of coarseness on their surfaces. Heavy damaged knives would require a course grit of around 220. That will surely cut away any unwanted parts of them.
When using a whetstone, your knife should be held at an angle of about 15-degrees and then the blade is dragged across the whole area of the whetstone repeatedly. The process is further repeated for the other side of the edge. Most stones have a grit of around 1500 and are the top choice of most hunters and chefs. You can finalize the process by pulling the edge at the cutting angle. That will ensure a nice polished finish.
As we said, hunters often require tools that are convenient to carry around, and no sharpening tool is better at that job than the sharpening rod. They are mostly used by butchers outside the hunting circles. If you have a very dull knife – this is the tool for you.
You need to hold the rod vertically placing its tip on a support surface. Hold the knife at about 20 to 25 degrees. Start with the edge which is closest to the handle and swipe the knife gently towards you. Repeat this for about 5 to 10 times for both sides. Once the desired sharpness is reached and proceed with wiping the knife with a wet towel, which will remove any metallic debris.
Final Thoughts
Having the sharpest possible hunting knife will always be a much-desired advantage among hunters. Even if you aren’t a hunter, and for example, love cooking, your knives will get dull at some point, and the methods presented here will also come in handy for you. Once again, what you need to keep your eyes out for is the type of whetstone you will be using and its coarseness. These factors can contribute to making the perfectly sharp knife, but can also damage your knife’s edge if ignored. Whenever you feel like learning how to sharpen your hunting knife, you will always need to remember that “practice makes perfect” has never been a more adequate expression, and what you further need is all the patience you can gather. Do this, and great results will quickly follow!
