
Deer blinds have always been a successful method of catching the best buck for the season. Whether they are stationary or some of the newer pop-up models, you always gain an advantage by being concealed and enclosed in case of inclement weather. Knowing how to build a deer blind, however, might be tricky since there are quite a lot of designs you can choose from as well as a few other things you need to take into consideration.
Head over to my Guide on the best ground blinds for bow hunting if you’re interested in more portable options. Now, let’s start with the steps required for the process of making a box stand:
- Planning
- Getting the materials
- Assembly and Transportation
Planning
Planning the design of your deer blind project is the most important step here. There are plenty of design options and free ground blind plans out there but the most common ones are 4-6 six feet long and around 6 feet high box blinds. Still, the size of the blind solely depends on the number of people you want to have inside at the same time. 4-by-4feet blinds are comfortable enough for a single hunter but if you want to have someone along with you, go for 5-by-5 feet, 4-by-6, or even larger.
Apart from the size, you will also need to determine how tall the blind will be. While that generally depends on the location, 4 to 6 feet tall blinds are typically good enough for most terrains and will give you a good enough view out.
The last two things you have to plan are the window opening sizes and whether you want to have a ladder or steps. The optimal distance for a shooting window from the floor is around 35 inches. That will be good enough for you to shoot with a shooting stick or fire your bow from a seated position. Whether you’re going to use a ladder or normal steps depends on your budget and how hard you want the project to be. A ladder is the simplest and cheapest solution while building steps will be much more comfortable but also harder and more expensive.
After you’re done planning the size, height, windows, and other parts of the blind it is time to stock up on all the materials you will need.
Getting the materials
The materials for the blind can be put into four groups:
- Frame materials
- Materials for the walls and skin
- Roofing materials
- Windows
Frame, legs, and floor
For the base (frame) of your blind, you want to get as good of lumber as you can get your hands on. If your blind is going to be shorter than 6 feet, you can get some 4-by-4s for the legs. If you want it to be higher, move up to 4-by-6s or 6-by-6s. That will reduce any swaying the blind will experience during bad weather. Wood from the peeler core will be best for that lumber. You can identify that by the growth rings.
For the floor, make sure you get treated wood rather than plywood as most other DIYers instruct will instruct you to do. Some 2-by-8 treated boards will give your floor a much longer life even if the blind is in a damp region with frequent rains. For the fasteners that you will use, some deck screws (3 and a half inches) that are stainless will do a perfect job.
Walls and Skin
How thick you want your walls is entirely up to you and the weather in that region. A universally good size is 2-by-4 although some people might consider it a bit thicker than needed. Still, if it’s treated properly, it should last you quite a while, even in heavy rains.
The skin of the blind is what you wrap it in. For that, you can use metal sheets, aluminum sidings, vinyl pieces, barn siding, or other large flat pieces of material that will waterproof the blind. Roofing companies often have second-quality metal sheets that can be quite cheap and will do an excellent job at protecting your blind from the elements.
Roof
For the roof, it is best to use sheet metal, although it might cause a bit of noise when it’s raining. In that case, plywood covered with roof shingles is your best option for a roof that will last you a long time.
Windows
With windows, you have to first make the choice of whether to cover them or not. Covered windows will insulate the blind in terms of noise, temperature, and scents but will also have to be opened or lifted every time you want to make a shot. The best of both worlds is to make sliding windows. While glass won’t handle such movements all the time, plexiglass will. On top of that, plexiglass is super durable, doesn’t break, and is quite cheap.
If you’ve ever wondered which is better between ground blinds and tree stands, make sure you check my article on the topic here! Now, let’s get into the next step of the process…
Assembly and Transportation
Where to assemble your blind is going to prove a very hard decision. On the one hand, building it in your backyard or workshop is going to be much easier thanks to all of your power tools being there (as well as having electricity for them). On the other hand, transportation to the point where you want to install it is going to be very difficult and you will have to transport it in different segments – legs, platform floor, box, roof, etc.
Building it on-site is also a bit tricky but some people argue that is much better and more time-saving. This is because you won’t have to transport anything but the materials and tools that you need. There is work to be done on the site anyway so might as well do it all there, right?
Regarding that additional work on the spot that you want to put the blind on, you will have to make holes for each of the legs and either insert them deep into the ground (not recommended) or make some deck footers that will hold your blind’s feet.
The last thing you have to do is to choose a comfortable chair for your blind. Click here if you want to read my guide on the best ground blind chairs for this year! Now, let’s check out a few more ground blind options that you can go with…
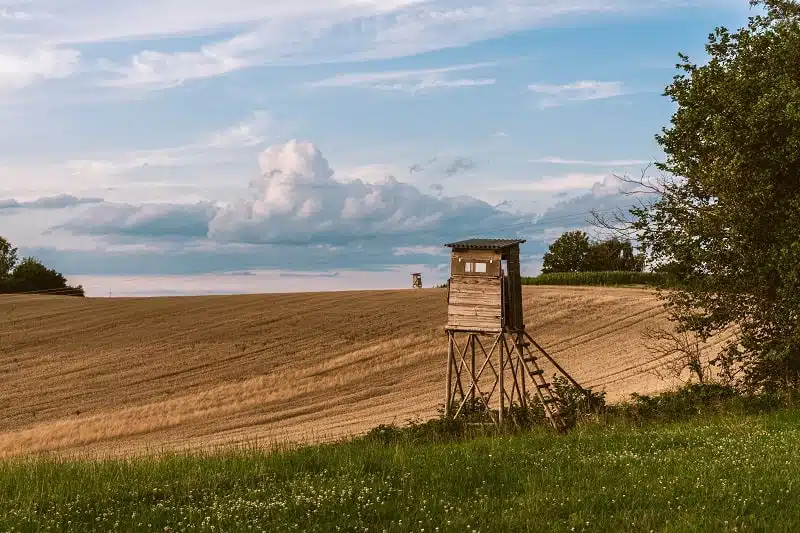
Elevated Blinds
While having a full-sized wooden hunting blind is great, you might also want to just make an elevated platform for your regular portable deer blind. Those give you a few advantages of an elevated point of view, less concern that your blind will sink into the mud below, more stability, etc. All these blinds require is a steady elevated platform that the portable blind will sit on. Those are typically great for food plots and are a good solution if you have a wasp issue. Since wasps tend to nest in the permanent blinds’ interior, you can take these down at the end of each hunt (or season) and you won’t even allow wasps the opportunity to get inside.
The process of making one of these platforms can vary a lot depending on your portable blind size but, in general, they repeat the first few steps of building a normal blind but you just stop at the elevated foundation and place a solid piece of plywood on top that will act as your flooring. Bonus points if you add some sort of soft material on the floor that will make things more comfortable and silent.
- For some of the best ground blind hunting tips, click here!
Other types of blinds you can make
If you feel like improvizing, there are two more blinds that you can make that do not require any tools but take some creativity.
The first type I want to mention is the Hay Bale blind. The good thing about these improvised blinds is that they are already on the field and chances are that deer have gotten used to them. All you need to do is move two bales close to each other. The rest is entirely up to you. You can fill the empty space either with bigger branches or with wood pieces constructing two walls, leaving a small gap in between them for you to look out from.
Natural blinds are also an effective money-free way to hide near a deer highway. Using your surroundings, you can construct a blind with some thick brush, leaves, and branches using a fallen tree for your support. Look for fallen trees that are high enough to hide you away when you’re sitting on your hunting chair.
Conclusion
Knowing how to build a deer blind might prove handy if you want to set up a hunting blind at a fixed spot that gets a lot of deer traffic. Every region has specific weather so make sure you get the appropriate materials. If there is frequent rain, winds, and heavy winter, get thicker wood pieces for the main frame, legs, and walls of the blind. If you don’t want to come up with a design of your own, there are plenty of free design options on the internet!
